GateBud
Help · Sites, questions and posters
Sites, questions and posters
A site is one gate. It has its own questions, its own documents, its own QR poster and its own check-out rules. You manage all of it from Sites & check-in in GateBud™, then the site's own page.
Most orchards have one site per entrance. If two entrances should keep separate records, make them two sites.
The sites list
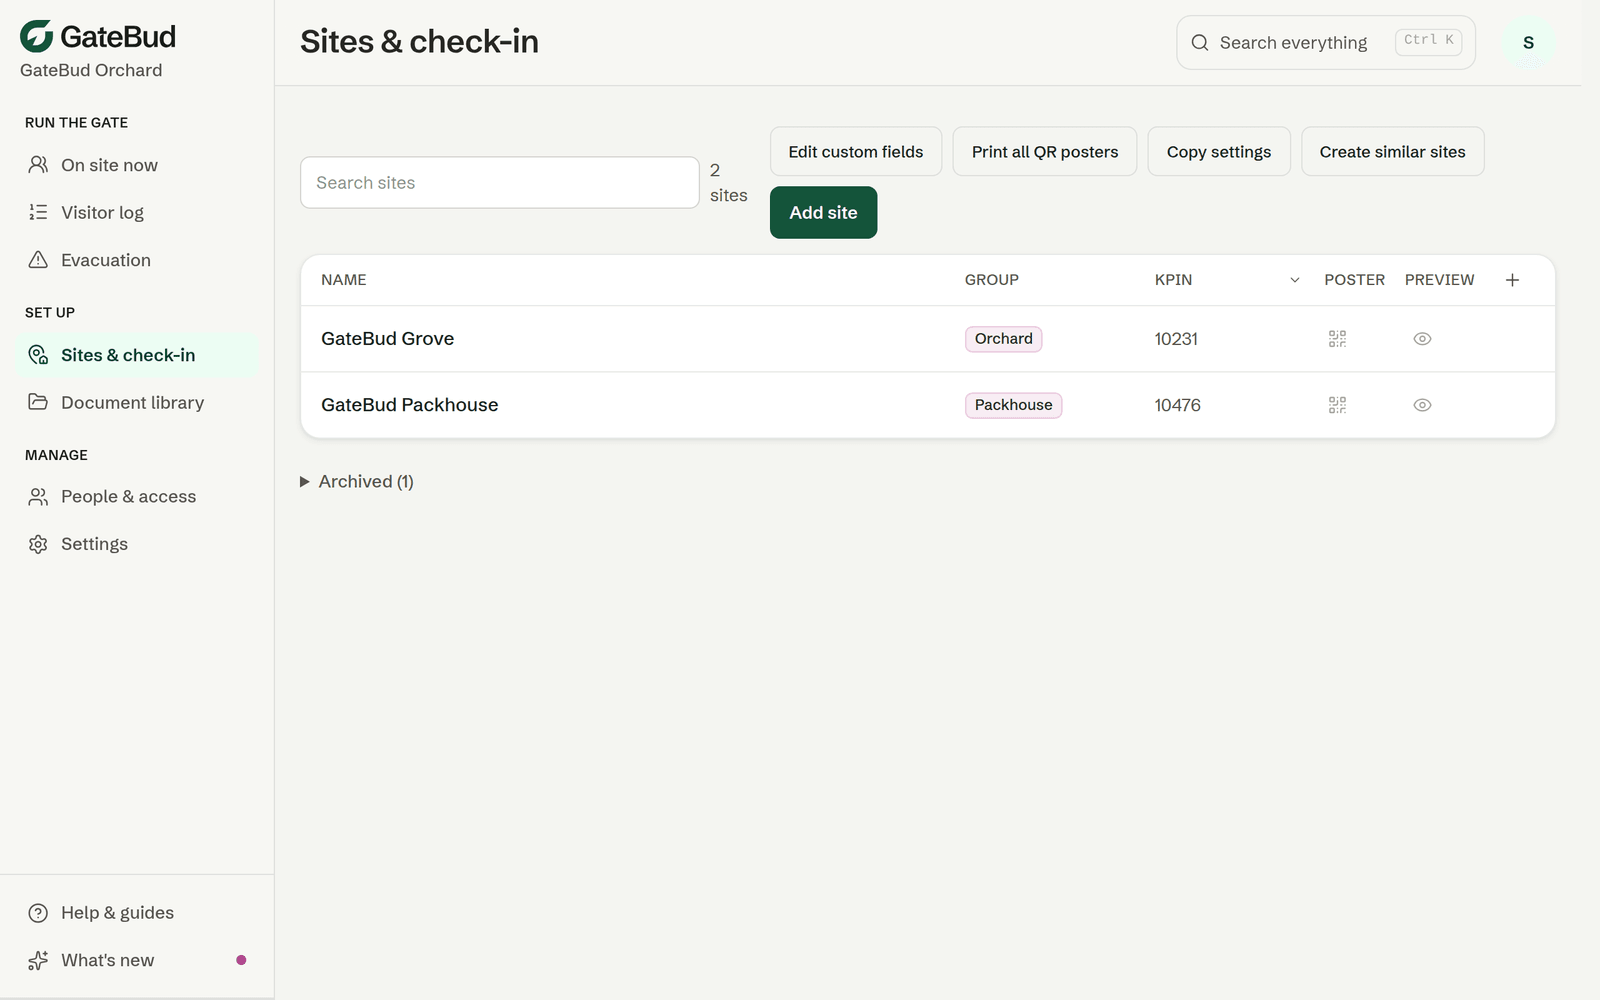
Every site is a row, with its Group, any extra details you have added, and two shortcuts: the QR icon opens the site's poster page, the eye icon opens a preview of its check-in screen. Search matches site names and extra detail values, so typing a KPIN finds the site too.
- Group is a free label for organising sites, for example "Orchard" or "Packhouse". It is internal only, visitors never see it.
- Extra details are the things your organisation tracks per site on top of the built-in ones, like a KPIN or a block number. Add one with the + at the end of the header row. Values show as columns here, can be searched, and are included automatically in exports.
Creating a site
- Go to Sites & check-in and tap Add site.
- Give it the name people actually use for that entrance, for example "Main packhouse gate". Visitors see this name on their phone, so avoid internal codes.
- Add the questions and documents below, then print the poster.
Only the name is required. The other fields are worth filling in:
- Address appears on the gate poster.
- Notify on check-in emails everyone on the list each time someone checks in. Add up to ten people. Internal only. A newly added address is first asked whether they want these alerts, and nothing is sent until they say yes.
- Check-in instructions show on the visitor's phone, before and after check-in, for example "Report to the office first".
- Emergency contact and phone show on the visitor's phone after check-in as a tap-to-call line.
You can change any of this later. The site page saves as you go, watch for "All changes saved" at the top. Changes apply to the next check-in and never alter past records.
Questions
These are the questions every visitor answers when they check in, for example "Have you been on another orchard in the last 24 hours?".
- Keep the list short. Three to five questions gets honest answers, fifteen gets guesses.
- Yes or no questions are fastest at the gate.
- You can reorder or edit questions any time. Past records keep the questions that were actually asked.
There are four answer types:
- Choice. The visitor picks from options you list. This is the workhorse: two options make a yes or no question, several make a pick-list, and a single option makes a tick-to-confirm box for read-and-agree. You choose whether they can pick one answer or several.
- Text. The visitor types an answer, up to 500 characters.
- Number. The visitor enters a whole number in a range you set, for example how many people are arriving with them.
- Expected hours on site. The visitor taps how many hours, 1 to 12, they expect to stay. Always optional, so it never slows anyone at the gate. When they do give a time, the Dashboard shows when they are due to leave and flags them if they run over. On their phone this question appears as "Expected time on site".
New questions are Required unless you switch them to Optional. A required question must be answered before check-in.
Documents
Documents are things a visitor must see when they arrive: site rules, an induction sheet, a site map.
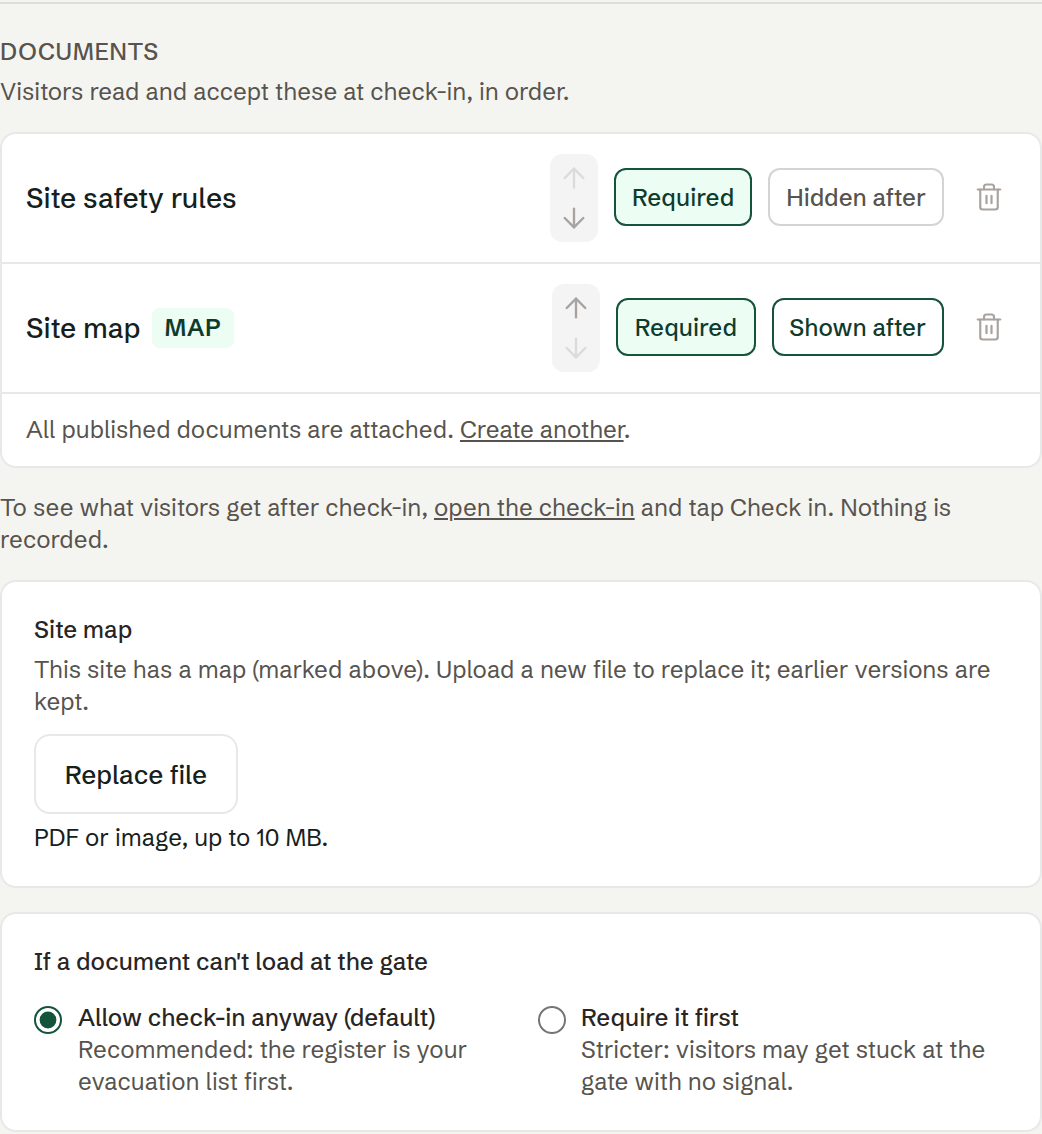
- Create the document once in the Document library.
- On the site's page, add the documents that apply to that site. Order them with the arrows, visitors read them top to bottom.
- Each document has two toggles. Required or Optional: required means visitors must confirm they have read it, and their confirmation, with the exact version they saw, is saved on their check-in record. Shown after or Hidden after: whether the document stays on the visitor's phone once they are checked in. The default is hidden, which keeps sensitive documents off a visitor's phone after they are through the gate.
One document can be attached to many sites. Update it in the library and every gate shows the new version from then on.
The site map
Below the document list is a slot just for a site map: muster points, hazards, access. Tap Choose file and upload a PDF or a picture, up to 10 MB. It appears to visitors like any other document, and the evacuation roll call links to it too. Replacing the file keeps earlier versions, so old records still point at the exact map that was shown.
If a document cannot load at the gate
Rural signal drops out. Each site has a setting for what happens when a document will not load on the visitor's phone:
- Allow check-in anyway (the default). The visitor checks in, and their record honestly says the document could not be shown. Recommended: the register is your evacuation list first.
- Require it first. Stricter. Visitors may get stuck at the gate with no signal.
Automatic check-out
Set per site, in the site's Settings tab. A new site starts with the hours rule on at 24 hours.
Anyone still showing as on site after that long is checked out for you. That is what stops people appearing to be on your orchard overnight, which would make both your Dashboard and your evacuation list wrong.
- After this many hours on site. Counts from when each person checked in. Leave the box blank to switch this rule off.
- Or every day at (NZ time). A daily cut-off on the clock, for example 7pm, when the site is definitely empty.
You can use either or both. Set the hours long enough to cover your longest genuine day, or you will check out people who are still there. An automatic check-out is marked as automatic on the record, so it is never confused with someone actually signing out.
Test a site without making a record
Open the site's preview, the eye icon on the sites list, or Open check-in on the site's page. Because you are signed in, GateBud lets you walk the whole visitor form end to end and nothing is recorded. A banner on screen confirms it, and only signed-in members of your team can ever see that preview.
Use this every time you change questions or documents. Fixing a badly worded question before anyone scans costs nothing.
The QR poster
The poster is how visitors find your check-in page. They point their phone camera at it, tap the link that pops up, and the form opens. No app needed.
- Open the site's poster page, the QR icon on the sites list.
- Pick a sheet. Poster is the full-colour gate sign. QR (light print) is the same sheet without the green band, easier on printer ink. Two-up A5 fits two posters on one A4. Nine-up tags prints nine small tags for vehicles, sheds and gate latches.
- Print or save poster (PDF) prints the sheet exactly as shown. Print at A4 or larger, laminate it or put it in a plastic sleeve so it survives rain and sun.
There are also SVG downloads: the full poster, or just the code, as vector files a signwriter or print shop can scale to any size. Print all QR posters on the sites list does every site in one run.
Each site has its own poster with its own QR code. Do not move a poster from one gate to another site, or check-ins will be recorded against the wrong site.
Where to put it
- At eye level, right where people stop as they arrive.
- Out of direct weather if possible. A faded or water damaged code can stop scanning.
- One poster per entrance. Print as many copies as you need, they are all the same for that site.
The short link under the code
Every poster also shows a short web address under the QR code, like gatebud.com/c/ABCDE. If someone's camera will not scan, they can type that address into their phone's browser instead and get the same check-in page.
If a poster is damaged or lost
Just print a new one from the poster page. The code does not expire and does not change, so a reprint always works. That stays true even if you archive the site later, a printed or signwritten code is never orphaned.
Copying one site's setup to the rest
Once your first site is right, you do not rebuild the others by hand. On the sites list, tap Copy settings, pick the site whose setup is already right, choose what to copy, questions, documents, automatic check-out, check-in screen details, notifications, then pick the sites to update.
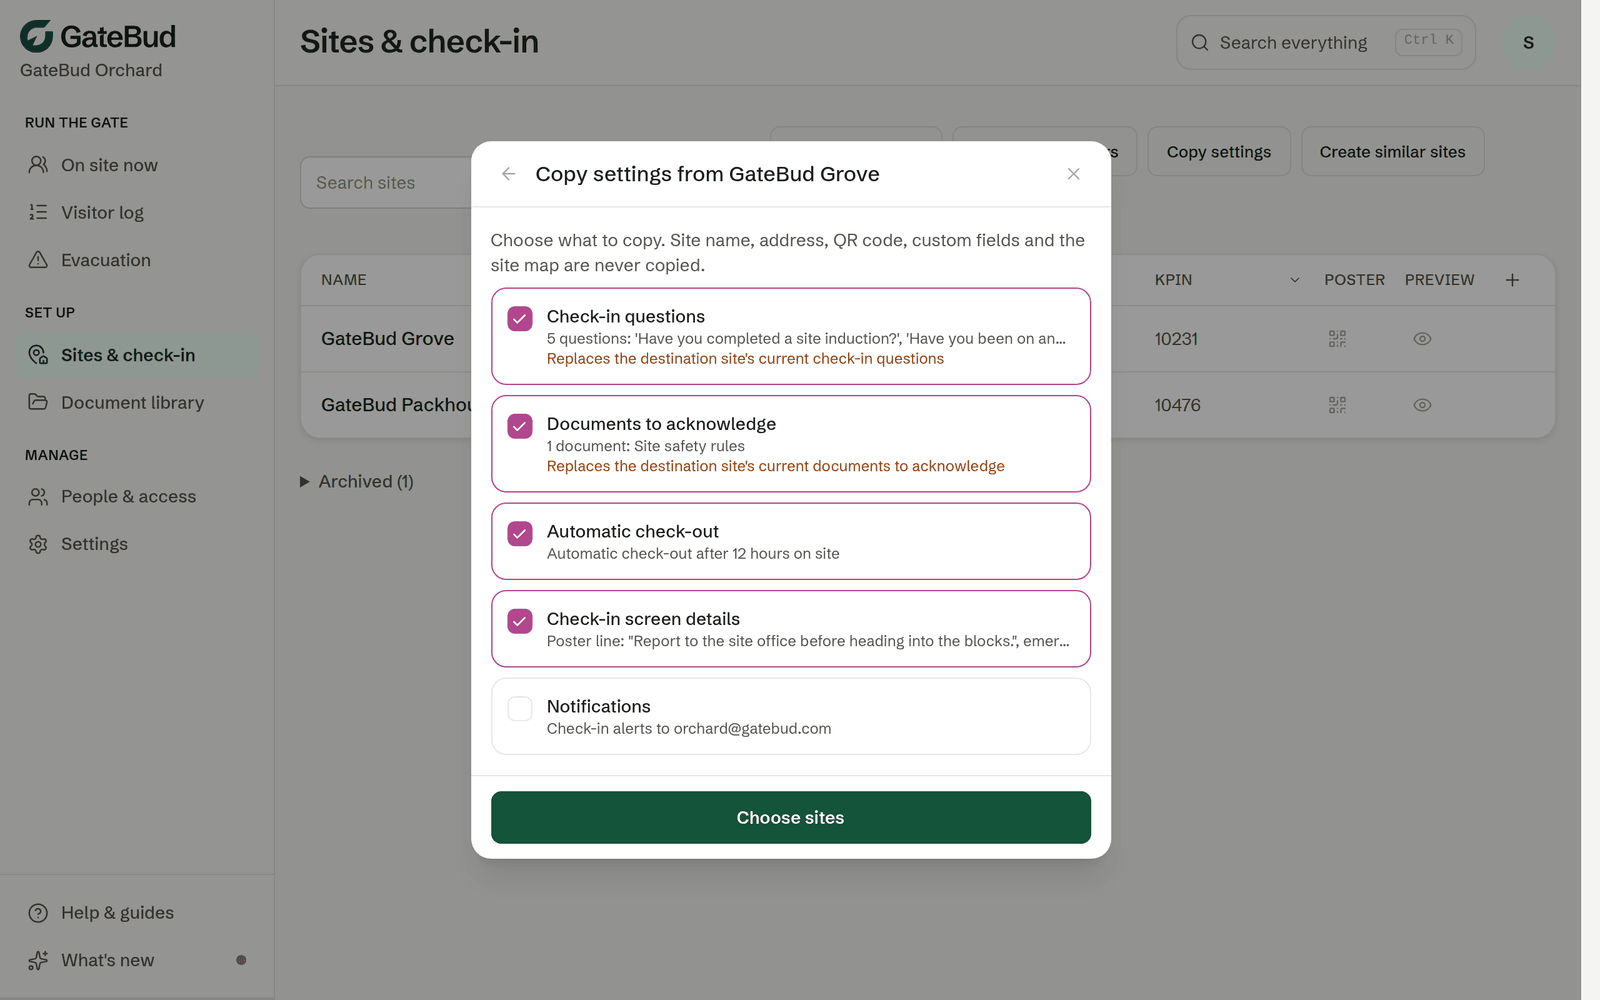
Site names, addresses, QR codes, extra details and site maps are never copied, they belong to each site. Every change is recorded, and past check-ins are never touched.
Adding new gates rather than updating existing ones? Create similar sites, next to it, does both jobs at once: pick the site whose setup is already right, type the new sites' names and details, and each one is created with that setup and its own fresh QR code.
Archiving a site
When a gate is finished with, archive it rather than deleting it. At the bottom of the site's Settings tab, tap Archive site.
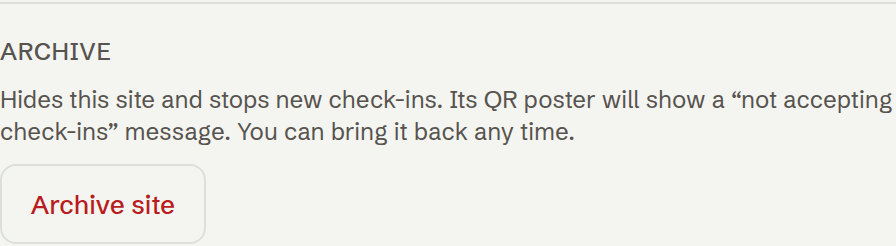
An archived site is hidden from your lists and stops accepting check-ins. Its poster keeps working in the honest sense: anyone who scans it sees "This gate isn't accepting check-ins right now", with your emergency contact if one is set, never a dead link. All its records stay in the Visitor log. Archived sites collect at the bottom of the sites list, and Unarchive brings one back any time.
Telling your gate staff
This is the step that decides whether any of it works. A poster nobody has been told about gets ignored.
Talk to whoever is on that gate. In person beats an email. You are asking them to do one new thing, so keep it to one sentence.
Something like: "From Monday, everyone coming on site scans the poster at the gate with their phone camera before they come through. It takes about twenty seconds. If someone cannot scan it, there is a web address printed under the code they can type in instead."
Then add the two things people always ask:
- No app to download. The phone camera opens it.
- It is for everyone. Contractors, drivers, visitors, anyone who is not staff. Decide with your own team whether staff scan too.
If someone's phone will not cooperate at all, let them through and sort it out afterwards. A queue at the gate is a worse problem than a missing record.
Rolling out to several gates
Start with your busiest gate and one or two others. Get those working properly for a few days before you do the rest, then let Copy settings do the heavy lifting.
Doing every gate at once sounds faster, but if something is set up wrong you find out everywhere at once, and the people on the gates lose confidence in it. A small start means you fix any surprise quietly.
If the Dashboard is still empty at the end of the first day, the posters are up but nobody has been told. Go back to the step above.
Why the questions and documents matter
The record of who was asked what, and who acknowledged which document, is your induction evidence under the Health and Safety at Work Act. GateBud keeps it automatically. You just keep the questions and documents current.